My external hard drive was working fine yesterday, but this morning a large folder of important photos and work files was suddenly gone. The drive still shows used space, so I’m hoping the data is still there, but I don’t know if this is file corruption, accidental deletion, or a drive failure. I need help with safe external hard drive recovery steps before I make things worse and lose everything for good.
I did this once with a travel folder. Thought I had nuked two years of photos off an external drive. Stomach drop, instant. So first thing, stop touching the drive.
When photos get deleted from an external drive, the files usually are not erased on the spot. The drive mostly forgets where they are and marks the space as free. Your pictures often still sit there until new data lands on top of them. If you keep using the drive, you raise the odds of wiping out the exact spots you need.
So do this first.
- Stop copying files to the external drive.
- Do not move folders around on it.
- Safely eject it.
- Leave it unplugged while you decide what to do next.
One thing matters before any software talk. Check if the drive itself looks sick. If you notice any of this, I would not do home recovery at all.
- Loud clicking, beeping, grinding, or scraping
- No spin, no light, no sign of power
- Your computer does not detect it anywhere, even after trying another cable or another machine
Those signs point to hardware trouble. If your drive is making weird noise and you keep powering it up, you might make it worse. At that point, a recovery lab makes more sense.
If the drive powers on, spins normally, and shows up fine, software recovery is the usual route for accidental deletion. You do not need a cleanroom job for a simple delete case.
I have tried a few of these over time. For photos, Disk Drill gave me the least headache. I liked it for one boring reason. It was easy to use when I was already stressed and tired. Its scan was also good at pulling image and video files by signature, and it has a camera-focused recovery mode. You can scan and preview results for free. If a photo preview opens cleanly, your odds are decent.
If you want a free route, PhotoRec exists. It works, sort of bruteforce style. It is open source and good at finding files by signature. The rough part is the workflow. It feels old, has no friendly interface, and tends to dump recovered files into messy folders with random names. I used it once and spent ages sorting junk from keepers.
Recuva is another free option on Windows. Easier than PhotoRec, no doubt. But its deeper recovery feels older now, and on photo-heavy jobs I did not get results as consistent as newer tools.
If you go with Disk Drill, this is the safest way I know to do it.
Safe recovery steps
1. Install it on your computer, not on the external drive
Put the software on your internal system drive. Keep all writes away from the drive where the photos went missing.
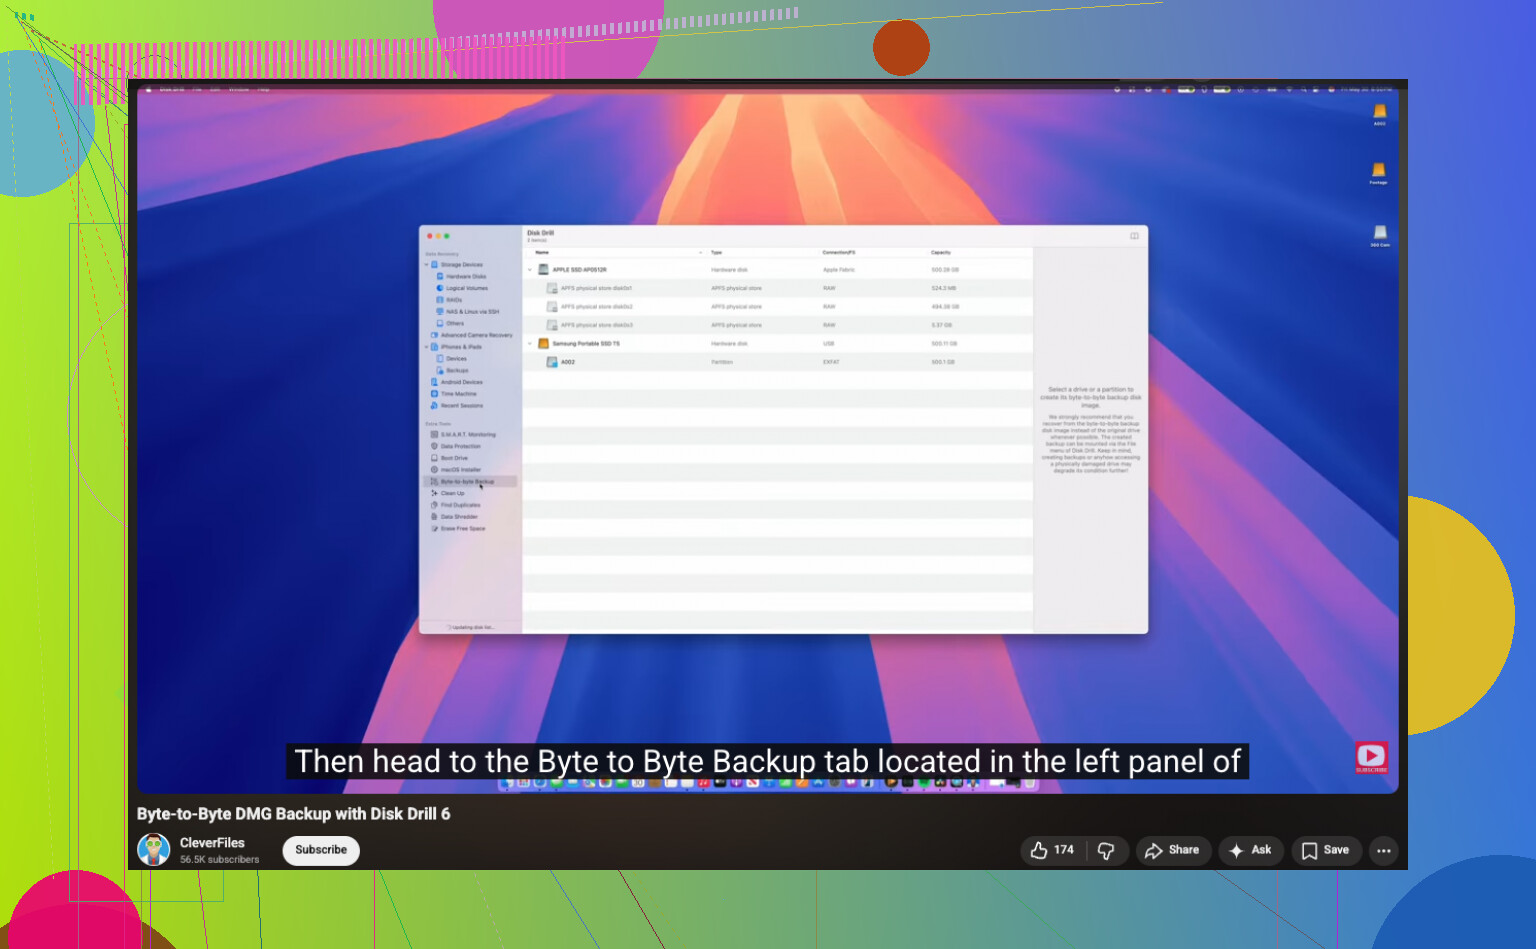
2. Make a full image of the external drive first
Reconnect the external drive. Before a deep scan, create a full clone image of it. Disk Drill includes this. The app reads the whole drive and saves a single image file to your computer.
For the byte-to-byte backup part, here is the video:

This step matters more than people think. If the scan crashes, if the cable flakes out, if the drive starts acting strange later, you still have a frozen copy of its current state.
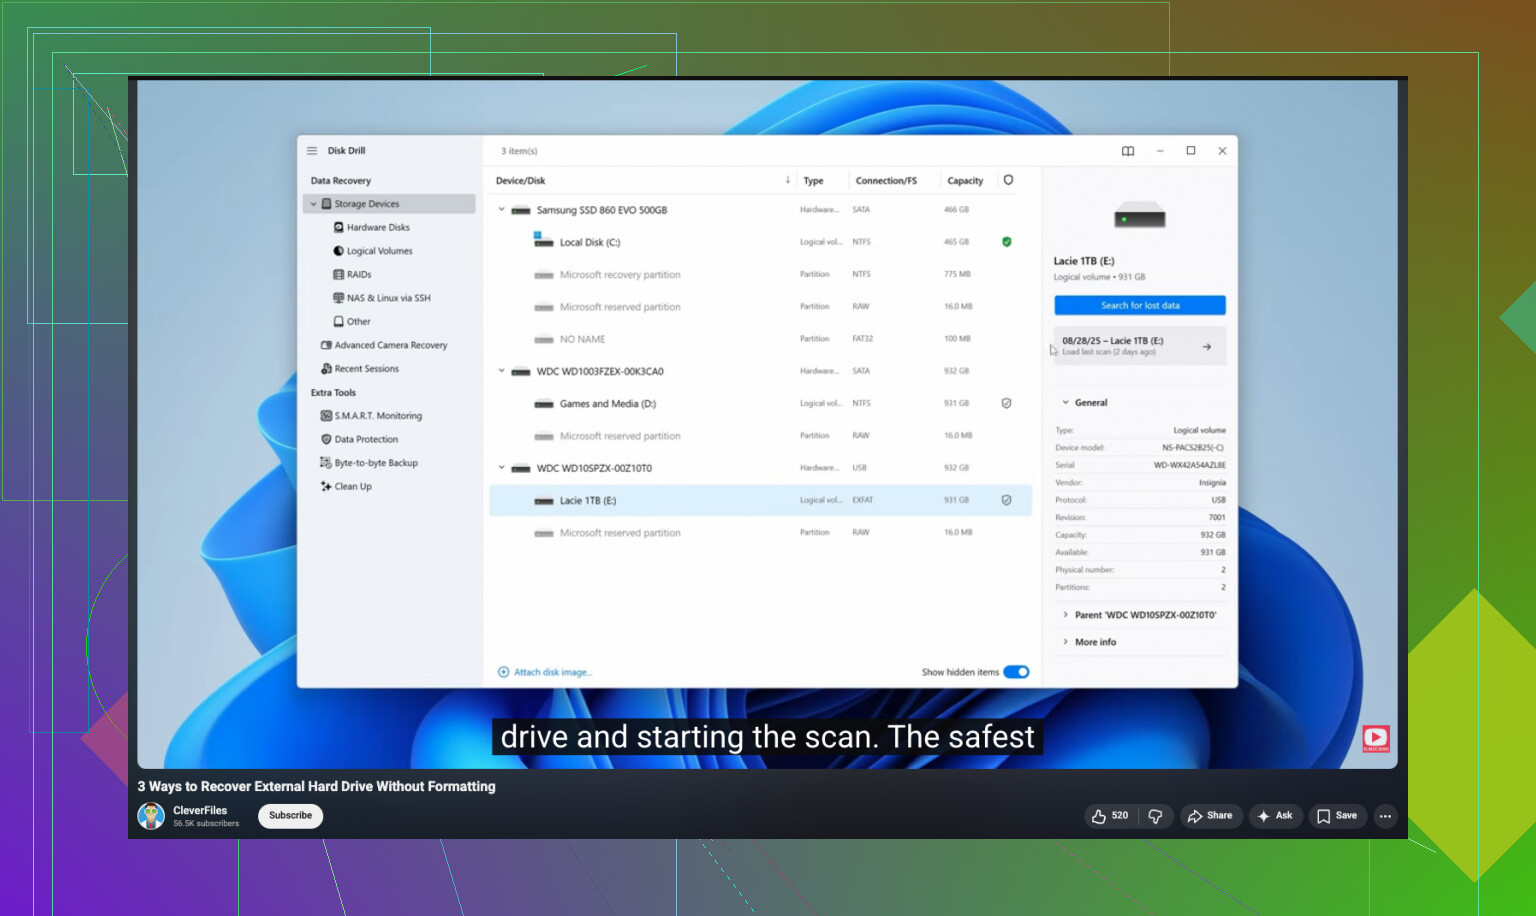
3. Scan the image, not the physical drive
After the image is done, unplug the external drive if you want. Run recovery against the image file. I prefer this every time. Less wear on the hardware, less chance of mistakes, less stress.
4. Recover files to a different place
Let the scan finish. Filter by images. Preview what you find. Recover the photos to your internal drive or another separate USB drive. Do not save recovered files back onto the original external disk. People do this in a panic. Bad move.
A few practical notes from my own mess:
- If filenames and folders are gone, raw recovery still might bring the image data back
- RAW photo formats, JPG, PNG, MP4, and MOV often show up if the blocks were not overwritten
- Preview is your friend, if it opens, the file is often usable
- If you see partial images, gray blocks, or broken previews, some data was likely overwritten already
The short version is this. If the drive is healthy, unplug it fast, image it, scan the image, and restore files somewhere else.
After I got my stuff back, I stopped pretending I would remember backups later. Use some version of 3-2-1. Three copies, two types of storage, one copy offsite. It sounds annoying right up until the day you need it.
5 Likes
If the space still shows as used, your files might still be on the drive. I agree with @mikeappsreviewer on one part, stop writing anything to it. But I would check for a simpler cause before a deep recovery scan.
Do these first:
- Enable hidden files on your computer.
- Search the drive for a few exact file names.
- Check if the folder got moved into another parent folder.
- Run a file system check. On Windows, use chkdsk /f on the drive letter. On Mac, use Disk Utility First Aid.
Sometimes the folder is not deleted. The file table is damaged, or the files got hidden after a bad eject. I have seen chkdsk bring back whole dirctory trees, though filenames sometimes come back messy.
If the folder still does not appear, use Disk Drill. It is one of the better options for external hard drive data recovery because it finds both deleted entries and raw file types. Save anything recovered to a different drive.
If you want a walkthrough, this external hard drive file recovery guide on YouTube is easier to follow than most.
One more thing. Check the drive SMART health with CrystalDiskInfo or DriveDx. If health is bad, stop and clone first. Don’t keep poking a dying disk.
Used space still showing is actually a pretty decent sign. It often means the data is still sitting there, but the folder structure or directory entry got messed up.
I agree with @mikeappsreviewer about not writing anything new to the drive, but I’m a little less enthusiastic than @suenodelbosque about running CHKDSK too early. Sometimes it helps, sure. Sometimes it “fixes” things in ways that make recovery more annoying, esp if the file system is already flaky. I’d treat repair tools as step two, not step one.
What I’d do:
-
Plug it into another computer first
Sometimes the folder “missing” is just an OS indexing / mount issue. -
Check Disk Management or Disk Utility
Make sure the partition is showing correctly and the expected size is there. -
Look for weird stuff at the root of the drive
Things like FOUND.000, files changed to shortcuts, or folders renamed with junk characters. That can point to file system corruption, not true deletion. -
Recover the important stuff before trying repairs
If the drive is readable, scan it with Disk Drill and recover to a different disk. That’s the key part. Disk Drill is solid for external hard drive data recovery because it can find both deleted records and files by signature when the folder tree is toast. -
Only after that, try repair tools if needed
Also, if this happened after unplugging without ejecting, or after a crash/power outage, I’d suspect file system damage more than actual deletion. Different problem, same end result: invisible files.
If you want a cleaner explainer on hard drive recovery options, this thread is worth a read: best ways to recover deleted files from a hard drive
One more thing people forget: check cloud sync apps. Dropbox, OneDrive, Google Drive, even Adobe stuff. I’ve seen folders “vanish” because sync conflict nonsense moved them or deleted them everywhere. Super annyoing, but fixable sometimes.