I accidentally deleted important files from an exFAT external drive and need help with data recovery before I make things worse. The drive hasn’t been formatted, but I’m not sure which recovery tools or steps are safest for restoring deleted files from an exFAT partition.
Stop using the drive first. That matters more than anything else. Don’t save new files to it, don’t let Windows format it, and don’t run CHKDSK or other repair tools yet. With exFAT, deleted files or even a quick format often just marks the space as free. The data may still be there until something writes over it.
exFAT shows up on a lot of USB sticks, SD cards, external SSDs, and portable hard drives, so this is a pretty common situation. If it’s an external HDD or SSD and the files were deleted in Windows, check the Recycle Bin just in case. For USB flash drives and SD cards, deleted files often skip the Recycle Bin, so it may be empty even if the files were deleted normally.
After that, I’d use recovery software rather than trying random fixes. I’ve had the best luck with Disk Drill for exFAT drives because it’s simple enough to use and handles deleted files, formatted drives, and corrupted exFAT volumes pretty well.
- Install Disk Drill on a separate drive, not the exFAT drive you’re trying to recover.
- Plug in the exFAT device and wait for it to show up in the app.
- Run a scan. Universal Scan is usually the right option.
- Let it finish, or start checking results while the scan is still running.
- Preview the files before recovering them.
- Recover everything to another drive. Don’t save recovered files back to the same exFAT device.
If you want a free option, TestDisk is worth a shot. It’s not as beginner-friendly, but it can be very useful when the issue is a lost or damaged partition instead of simple file deletion. In a lot of cases, it can help restore access to an exFAT partition without formatting anything.
The one big catch is SSDs. If the exFAT drive is an SSD, recovery depends a lot on TRIM. TRIM tells the SSD which deleted blocks it can clear internally. Once that happens, recovery software usually can’t bring those files back. Internal SSDs almost always use TRIM, so deleted-file recovery may be impossible. External SSDs over USB are a little different because TRIM may not be passed through, or it may work inconsistently, so recovery is sometimes still possible. Regular hard drives, USB flash drives, and most SD cards don’t behave the same way, so the odds are often better there.
If the drive clicks, disconnects constantly, won’t show up on multiple computers, or has obvious physical damage, I’d stop trying DIY recovery. That usually points to hardware failure, and every extra attempt can make the situation worse. At that point, a professional data recovery lab is the safer route.
If it’s only a file system issue, exFAT recovery can go pretty well. The key is to stop using the drive right away and recover the files to a different device before anything gets overwritten.
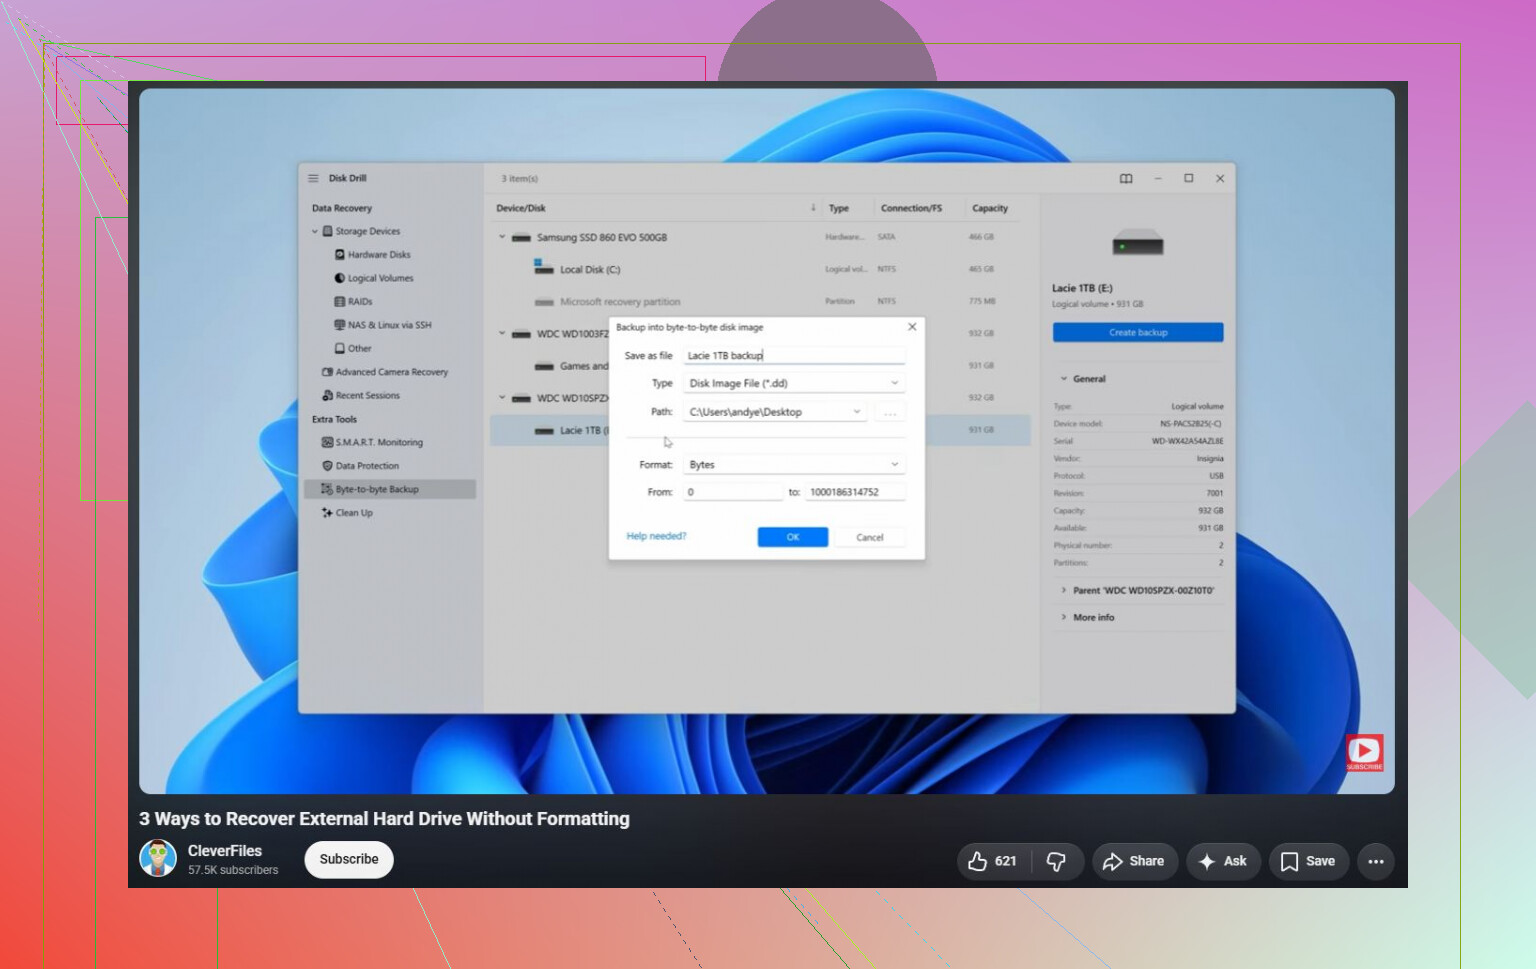
Clone it before you get curious. If the files matter, the safest DIY move is to make a full sector-by-sector image of the exFAT drive onto another disk, then run Disk Drill or any other recovery tool against the clone/image instead of the original. That way if the scan, the cable, the enclosure, or the drive itself acts weird, you still have the first untouched copy. This matters more if the drive is older, slow to mount, disconnecting, or making odd noises. If it is a healthy USB stick and the files are replaceable, scanning directly is probably fine, but for anything important I would not make the original drive do extra work.
Do not open the drive in Explorer or Finder and start poking around “just to check.” Even browsing can create thumbnails, indexing files, trash folders, or other small writes depending on the system, and on exFAT those small writes can land right where deleted file data used to be.
The cloning advice above is the safest path, but if you’re trying to keep this simple, at least make the drive read-only before scanning. On Windows, don’t accept “scan and fix.” On macOS, don’t let it write Spotlight indexing junk to the disk if you can avoid it. If you have a write-blocker, great, but most people don’t, so the practical version is: plug it in only when you’re ready to image or scan, then recover to a completely different disk.
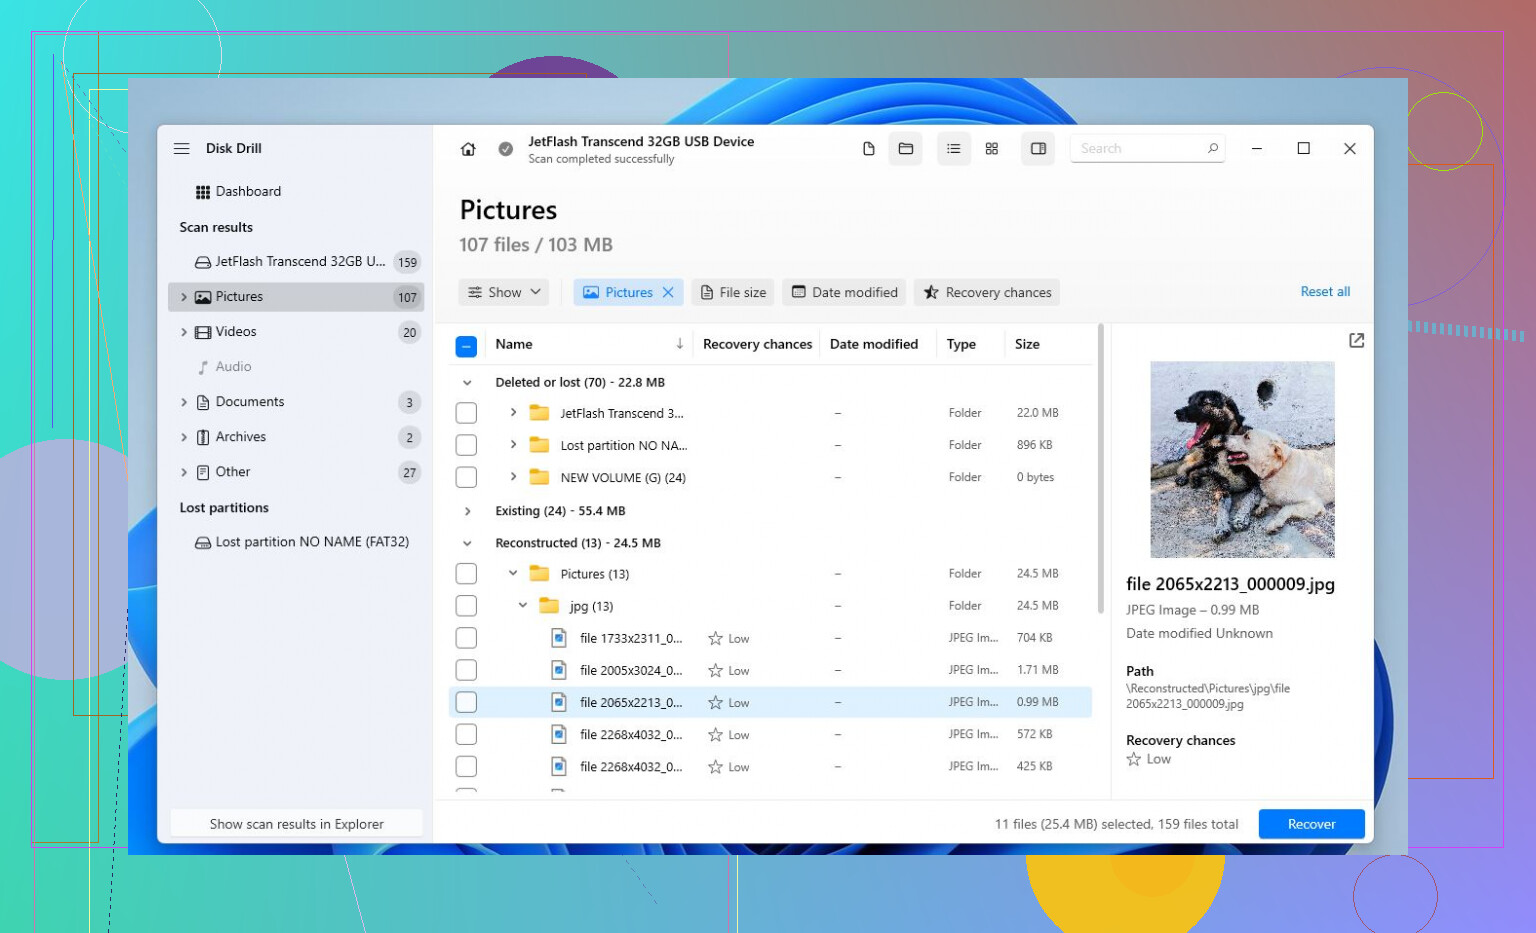
Disk Drill is fine for a beginner-friendly scan, especially if you need previews before paying or committing to recovery. The caveat is that a “found files” result may not mean clean recovery. If the deleted files were fragmented, some recovered items may open corrupted, and file names/folders may be missing if the directory entries are damaged. So don’t judge the scan only by the number of files it finds. Preview the exact important files first, recover a small sample to another drive, and verify they actually open before spending hours recovering everything.
The file types and how they were created matter more than people expect. Recovering a folder of JPEGs from an exFAT camera card is a different problem from recovering a video project, a Lightroom catalog, a ZIP archive, or a VM image. Some files can survive missing names and folders. Others are useless if even one chunk is wrong.
I agree with the cloning/read-only advice above, but I’d be careful about judging the result by “files found.” A lot of recovery programs show two kinds of results mixed together: files found from the file system records, and files found by raw signature scanning. The first group is usually more likely to have the original names, sizes, and folder structure. The raw scan group may just be “file000123.jpg” or similar, and it may include partial files, duplicates, or old deleted junk from months ago.
Disk Drill is fine if you want a nicer interface and previews, but use the preview feature as a sanity check, not as decoration. If the important stuff is photos or PDFs, previewing can tell you quickly whether the recovery is real. If it’s large videos, archives, audio projects, database files, or anything made of many linked pieces, opening one preview may not prove the whole thing is intact. Recover a few samples to another disk first and actually open them in the program that normally uses them.
Another small trap: don’t rename, “repair,” convert, or organize recovered files until you’ve copied the raw recovered set somewhere safe. People sometimes recover a messy pile, start cleaning it up, then realize they need to run a different scan and no longer know what came from where. Keep the first recovery untouched, then make a second working copy for sorting.
If the files are business-critical or irreplaceable, don’t run five different tools directly on the original drive just because the first scan looks disappointing. Image it once, then experiment on the image. If it’s just personal stuff and the drive is healthy, scanning directly is a reasonable shortcut, but the destination must be a different drive with enough free space. Saving recovered files back onto the same exFAT volume is the fastest way to turn a maybe-recoverable deletion into a self-inflicted overwrite.